
This is my 12th oil painting. While the actual time to complete this painting was about 12 days, those 12 days were spread out over two months. I used a combination of wet-into-wet and wet-into-dry techniques. I did not use any added mediums in the paint or artificial dryers: the paint came straight out of the tubes. Please enjoy my tutorial “River Through the Adirondacks” by John O’Keefe Jr.
Composition and Materials – “River Through the Adirondacks”
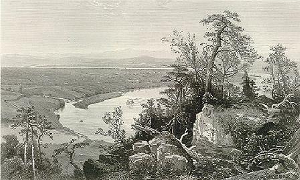
I was aiming for a Hudson River School feel with this painting. I found an old black and white Victorian engraving I liked online and decided to base my painting on its features. Furthermore, I do not know the scene’s location in this engraving, but I assume it is a real place. Because the engraving reminded me of the Hudson Valley, I named my painting “River Through the Adirondacks.”
My final painting differs from this reference material in the details. I had cropped the far-right portion of the engraving out of my painting, but the larger aspects of the composition can still be seen in my finished work.
- Support: Pre-Stretched & Mounted Medium Textured Cotton Canvas (Acrylic Primed)
- Size: 16 x 20 inch
- Medium: Winsor & Newton Artist Oils Professional Grade Oil Paints
(Ivory Black, Titanium White, Ultramarine Blue, Sap Green, Naples Yellow, Raw Sienna, and Burnt Sienna) - Finish: Winsor & Newton Dammar varnish
Step-By-Step Tutorial – “River Through the Adirondacks”
Day 1

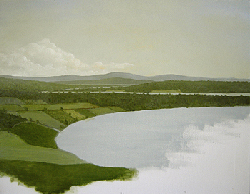
Painting begins by completing the sky with significant land and water areas blocked-in. In the foreground (unpainted white areas) will be the close-up details of the trees, foliage, and rocks. Before painting those details, I must finish the distant scenery and waterways.
Day 2
I have added more definitions to the low-land areas. The fields are more defined now.
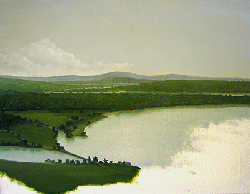
Day 3

Here is an update on the distant land features: You can see that I tightened things up a bit and added increased detail and contrast to the forests and distant hills of the low-land areas.
Day 4a
I thought the painting from Day 3 had too much of an agricultural feeling, and I wanted something more natural and park-like. Compare the middle-left areas between Day 3 and Day 4 images to see the new direction in which I took the painting. I also began to add shoreline shadows and reflections. (One nice feature about working with oils is the slow dry time, you can scrape off entire areas and redo them without anyone ever knowing unless you tell them!)
Day 4b

I finished Day 4 by updating the tree shadows and the little island feature at the river’s bend. I also updated the last shadows and reflections along the shoreline.
Day 5 & 6
I let the painting dry for about three weeks before starting this phase. Now I was ready to add the details and the foreground. I began by blocking the tree line and mountain features. I used the reference picture strictly at this point.
Day 7

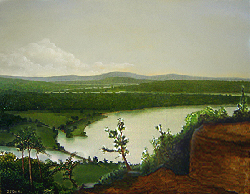
Once happy with the tree line, I laid out the rock formations: several large boulders in the middle and a large cliff face to the right.
Day 8
At this point, I continued to try to match the reference engraving image for the foreground details. You can see shrubs covering the boulders and several tall tree trunks coming up from around the cliff.
Day 9
This one is challenging. Many trees are in the foreground, and the proper contrast proved difficult. I redid the foliage in the front-center rock cropping near the bottom, and more is coming. (i.e., a Large rock on the right and a large tree that you can make out the trunk on top of the rocks, plants, and smaller greens in the lower right corner.)
I’ll probably go over the entire painting with a detail brush to add in the final highlights and deep shadows. I’m thinking of adding some blue flowers in the foreground to the right and more browns into the closer trees and bushes for more color variation.
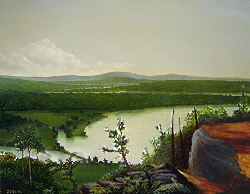
Day 10
Again I broke from the reference material and decided to make the foreground-right less rocky. Notice the flat areas to the right are covered with short grass. This would be a perfect place for people to visit and walk around. I think it’s more inviting than the wilderness of the original reference image.
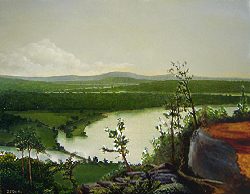
Day 11
I have extended the flat grassy area to the middle section. I brought the center tree into the foreground rather than having it come up from behind the rock cropping. Now you could walk right up to it and lean on it while viewing it. Also, I added the large tree on the top rock cropping.
You can walk up to this spot to see the sights. I started adding the shadows that were being cast by the larger trees. I wanted to give the viewer a sense that the sun was off in the direction of those distant clouds, perhaps just off the canvas in the upper-right corner.
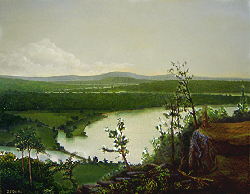
Day 12

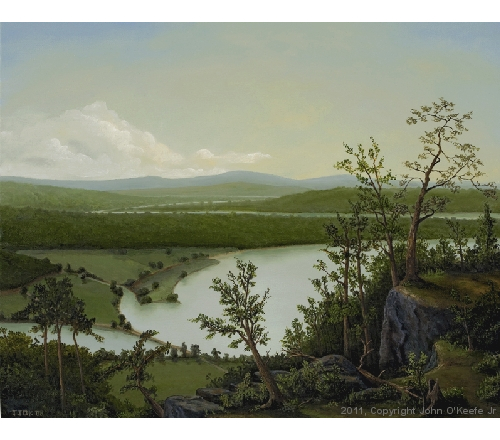
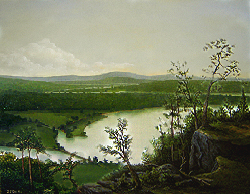
Now comes all the small shrubs, trees, and other foliage. I went over the foreground to bring out highlights. Notice the tree trunk still in the ground next to the fallen tree. Although it’s hard to see, I ensured the lighting and shadows coming off the trees in the lowlands were consistent with the shadows I added to the foreground.
Finished Painting – “River Through the Adirondacks”
I hope you enjoyed my tutorial “River Through the Adirondacks” by John O’Keefe Jr.